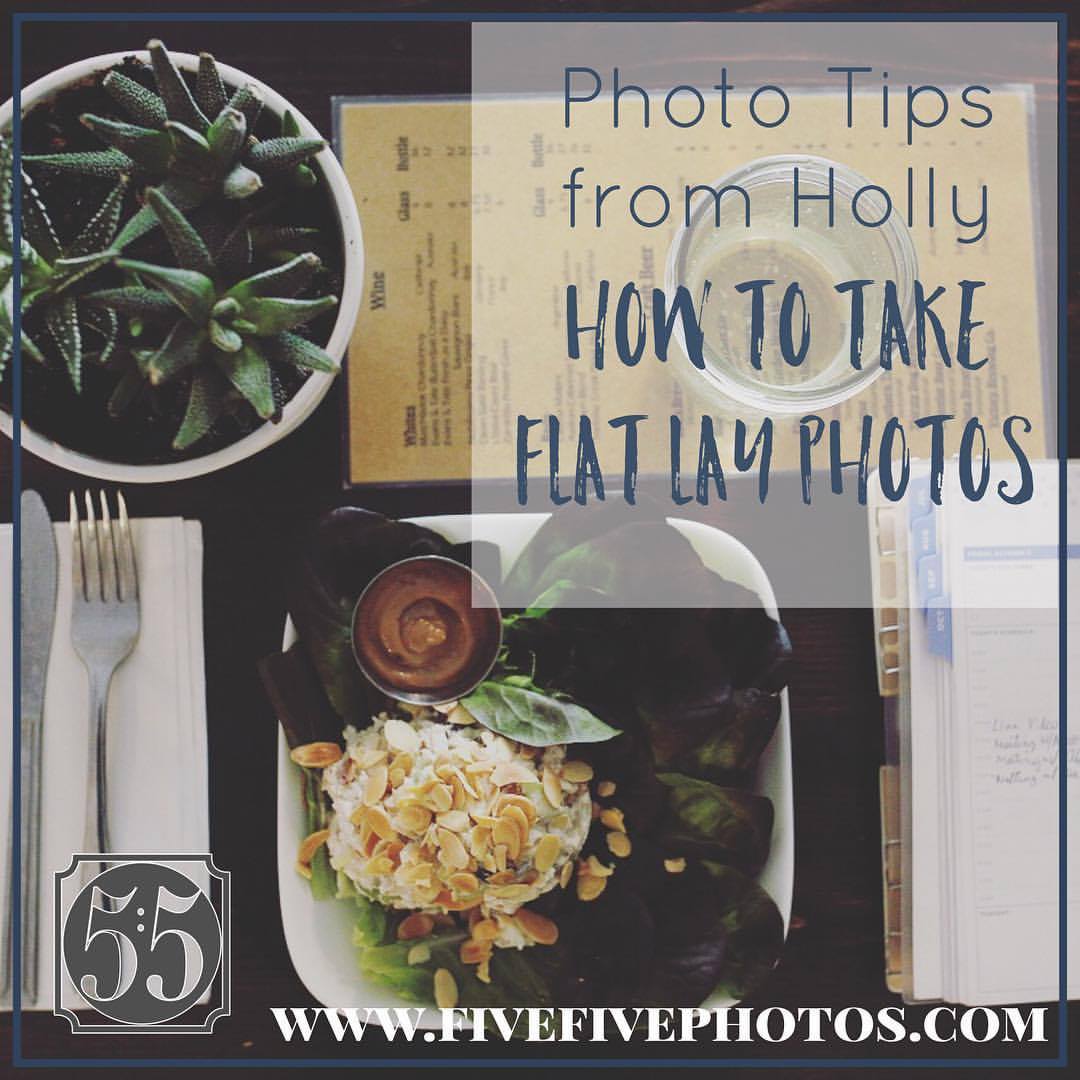
Flat Lay Photography
Friday Photo Tips by Holly
Happy Friday everyone! I have been so excited to tell you all a few tricks I love to use when doing Flat Lay Photography.
Wait, what is Flat Lay Photography?
Flat lay photography is simply styling objects onto a flat surface then taking an image from above. Here I give you 5 easy steps, tips, and ideas! Watch the live video to see my flat lay photography in action! Many people use this style of photography for taking trendy photos of the products they create or sell, for creating an inspirational post, or for showing a little about what they use every day. Flat lay photos are intriguing. You can incorporate so many unique elements that suit your style or message. My favorite thing about flat lay photography: it allows you to use your creativity in a really unique way!
The Steps to GREAT Flat Lay Photography
- Plan it.
- Figure out what your message is going to be. Did you make a hat and you want to showcase it? What do you want people to know about this hat? What time of year is it intended to be worn? What outfit would it look good with? What is the hat made out of?
- Gather Props.
- You don’t have to go crazy here, but for sure have fun! Let us keep going with the hat example. Say it’s a knit red winter hat. My props may be a small piece of evergreen to signify the time of year, a cup of steaming hot chocolate to provoke that feeling of coming in for hot chocolate after playing in the snow (where you would be wearing the hat). A ball of the left over yarn and maybe the knitting needles to show what and how it was made. And maybe I would take a few with a flannel that would match.
- Set it up.
- Find a location with natural light. Like by a sliding glass door.
- Have a surface for your objects to lay on. (View tips section for some suggestions).
- Arrange:
- Lifestyle
- With this scenario you will want to arrange the items in a seemingly carefree way. No rhyme or reason, just in a way that looks pleasing to your eye.
- Grid
- This is exactly how it sounds. Line the items up as if they were in a grid. Have equal spacing between each item.
- Extra Room
- Remember the video I did about composition? Think of this layout as a landscape image. Put your items in the third and let the rest of the photo be negative space. That negative space actually helps to simplify the image and draw your eyes right to the main object.
- Think of Text
- This can be set up in any of the ways listed above. You just simply make a point to create blank space for text.
- The main attraction
- Set up the featured item with only one of the props you chose. Have the object right in the center of the photo then frame it with the prop. The point is tp be incredibly clear about what the photo is all about.
- Lifestyle
- Take the photo
- You CAN use your phone!
- Did you know many high end professional photographers utilize their iPhones for this type of photography? It’s true. Now this isn’t always the case but it is possible and completely acceptable. Why would you use your phone if you have a fancy camera? Because it is easier and faster and we know these images are meant for the web so they don’t have to be huge files. Now, if I was hired by a client for Lay Flat Photography that they were going to use in print, for advertising on a billboard or elsewhere, then I would for sure use my fancy camera. But if I am doing lay flat photography for my Instagram page to show off the fancy new Young Living oils that I got, use, and love, you better believe I’m going to make it as quick and easy as I can for myself.
- Use natural light.
- Stand over your set up.
- You CAN use your phone!
- Edit the image
- With Instagram.
- Instagram editing goes past the filters now! Utilize this easy tool to edit your images quickly.
- Add text and graphics.
- I’ve been using and loving an app called “Over”
- With Instagram.
Here’s a few tips I have for you to use as you style and explore your own Lay Flat Photography
- Lay Flat Photography Surface Ideas:
- Wood
- White Foam Core
- Wall paper
- Wrapping Paper
- Packaging paper
- Tile slabs
- Granite slabs
- Blanket
- Fluffy rug
- Use a reflector
- This is one of the best and easiest and cheapest tips I have for you! Put together 2-3 white foam core boards with tape! They will be a free standing subtle reflector. They can also help with styling the photo by giving a clean white background.
- Get as many different photos as possible
- Get more than just lay flat images with your set up.
- You took the time to set this all up. Get as many complications and angles as you can with each set up
- Take some wide.
- Take some zoomed in.
- Turn your camera for a different angle.
- Get a shot with all the props and with one at a time.
- Get more than just lay flat images with your set up.
That’s it guys! I hope this little blog post was a HUGE help to you!
Now go check out my Instagram for examples. Be sure to follow me and stay tuned to find out what amazing things I have planned for you all with my Christmas mini session days!
Here’s the Live Video version of this Blog.
Sorry for the craziness!
#momlife #mombrain