

Shooting in Manual- The Basics
In 2010 I held a DSLR in my hands for the first time. Naturally, I wanted to learn everything I could about my new toy. As my awesome photographer sister-in-law tried to explain how to adjust the exposure, iso, and aperture I was, to put it kindly, overwhelmed. I had never heard those terms and I had NO idea what they meant. If this is how you are feeling, keep reading! It is not as hard as it sounds. But getting it right with the first shot will take a little practice.
Shutter Speed
“The time for which a shutter is open at a given setting.” For me, it is easier to remember the function of different parts of the camera by associating them with my own eye and how it functions in different light. So I always explain that the shutter speed is like your eyelid. If you blink, you get a quick still shot of what is around you. If you hold your eyelid open for a longer period of time you will take in more information (light) and you will see more movement. Is high or low better? It depends on what you are going for. Some photos look great with a little motion blur. Sometimes, it is so bright outside you need to make your shutter speed higher so that not as much of the light can get in. (Think about those bright days when you have to squint your eyes.) High shutter speed = crisp/little motion and less light in photo. Low shutter speed = more motion and more light in photo.
Low (1/60-) Shutter Speed Example:
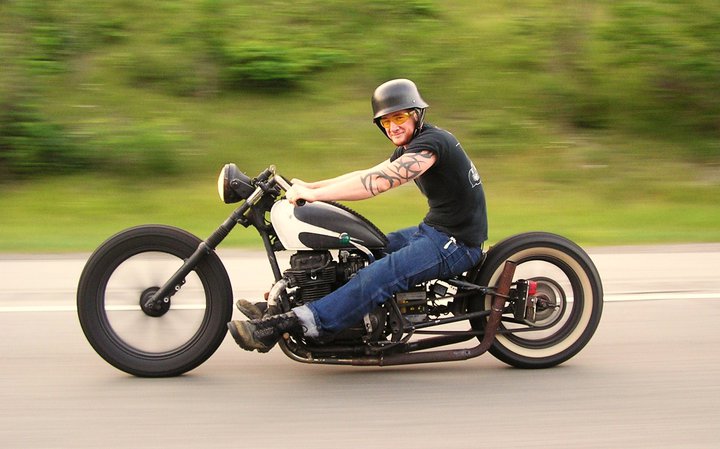 With this particular photo I wanted a slower shutter speed so that I could “Pan” (To pan is to move my camera at the same speed as the moving subject so the background has motion but the moving subject is crisp. NOTE: This is really easy when you are driving at the same speed of another vehicle, but really difficult if you are trying to match the speed of a running toddler.) Yes, this is my handsome husband on his motorcycle. 🙂
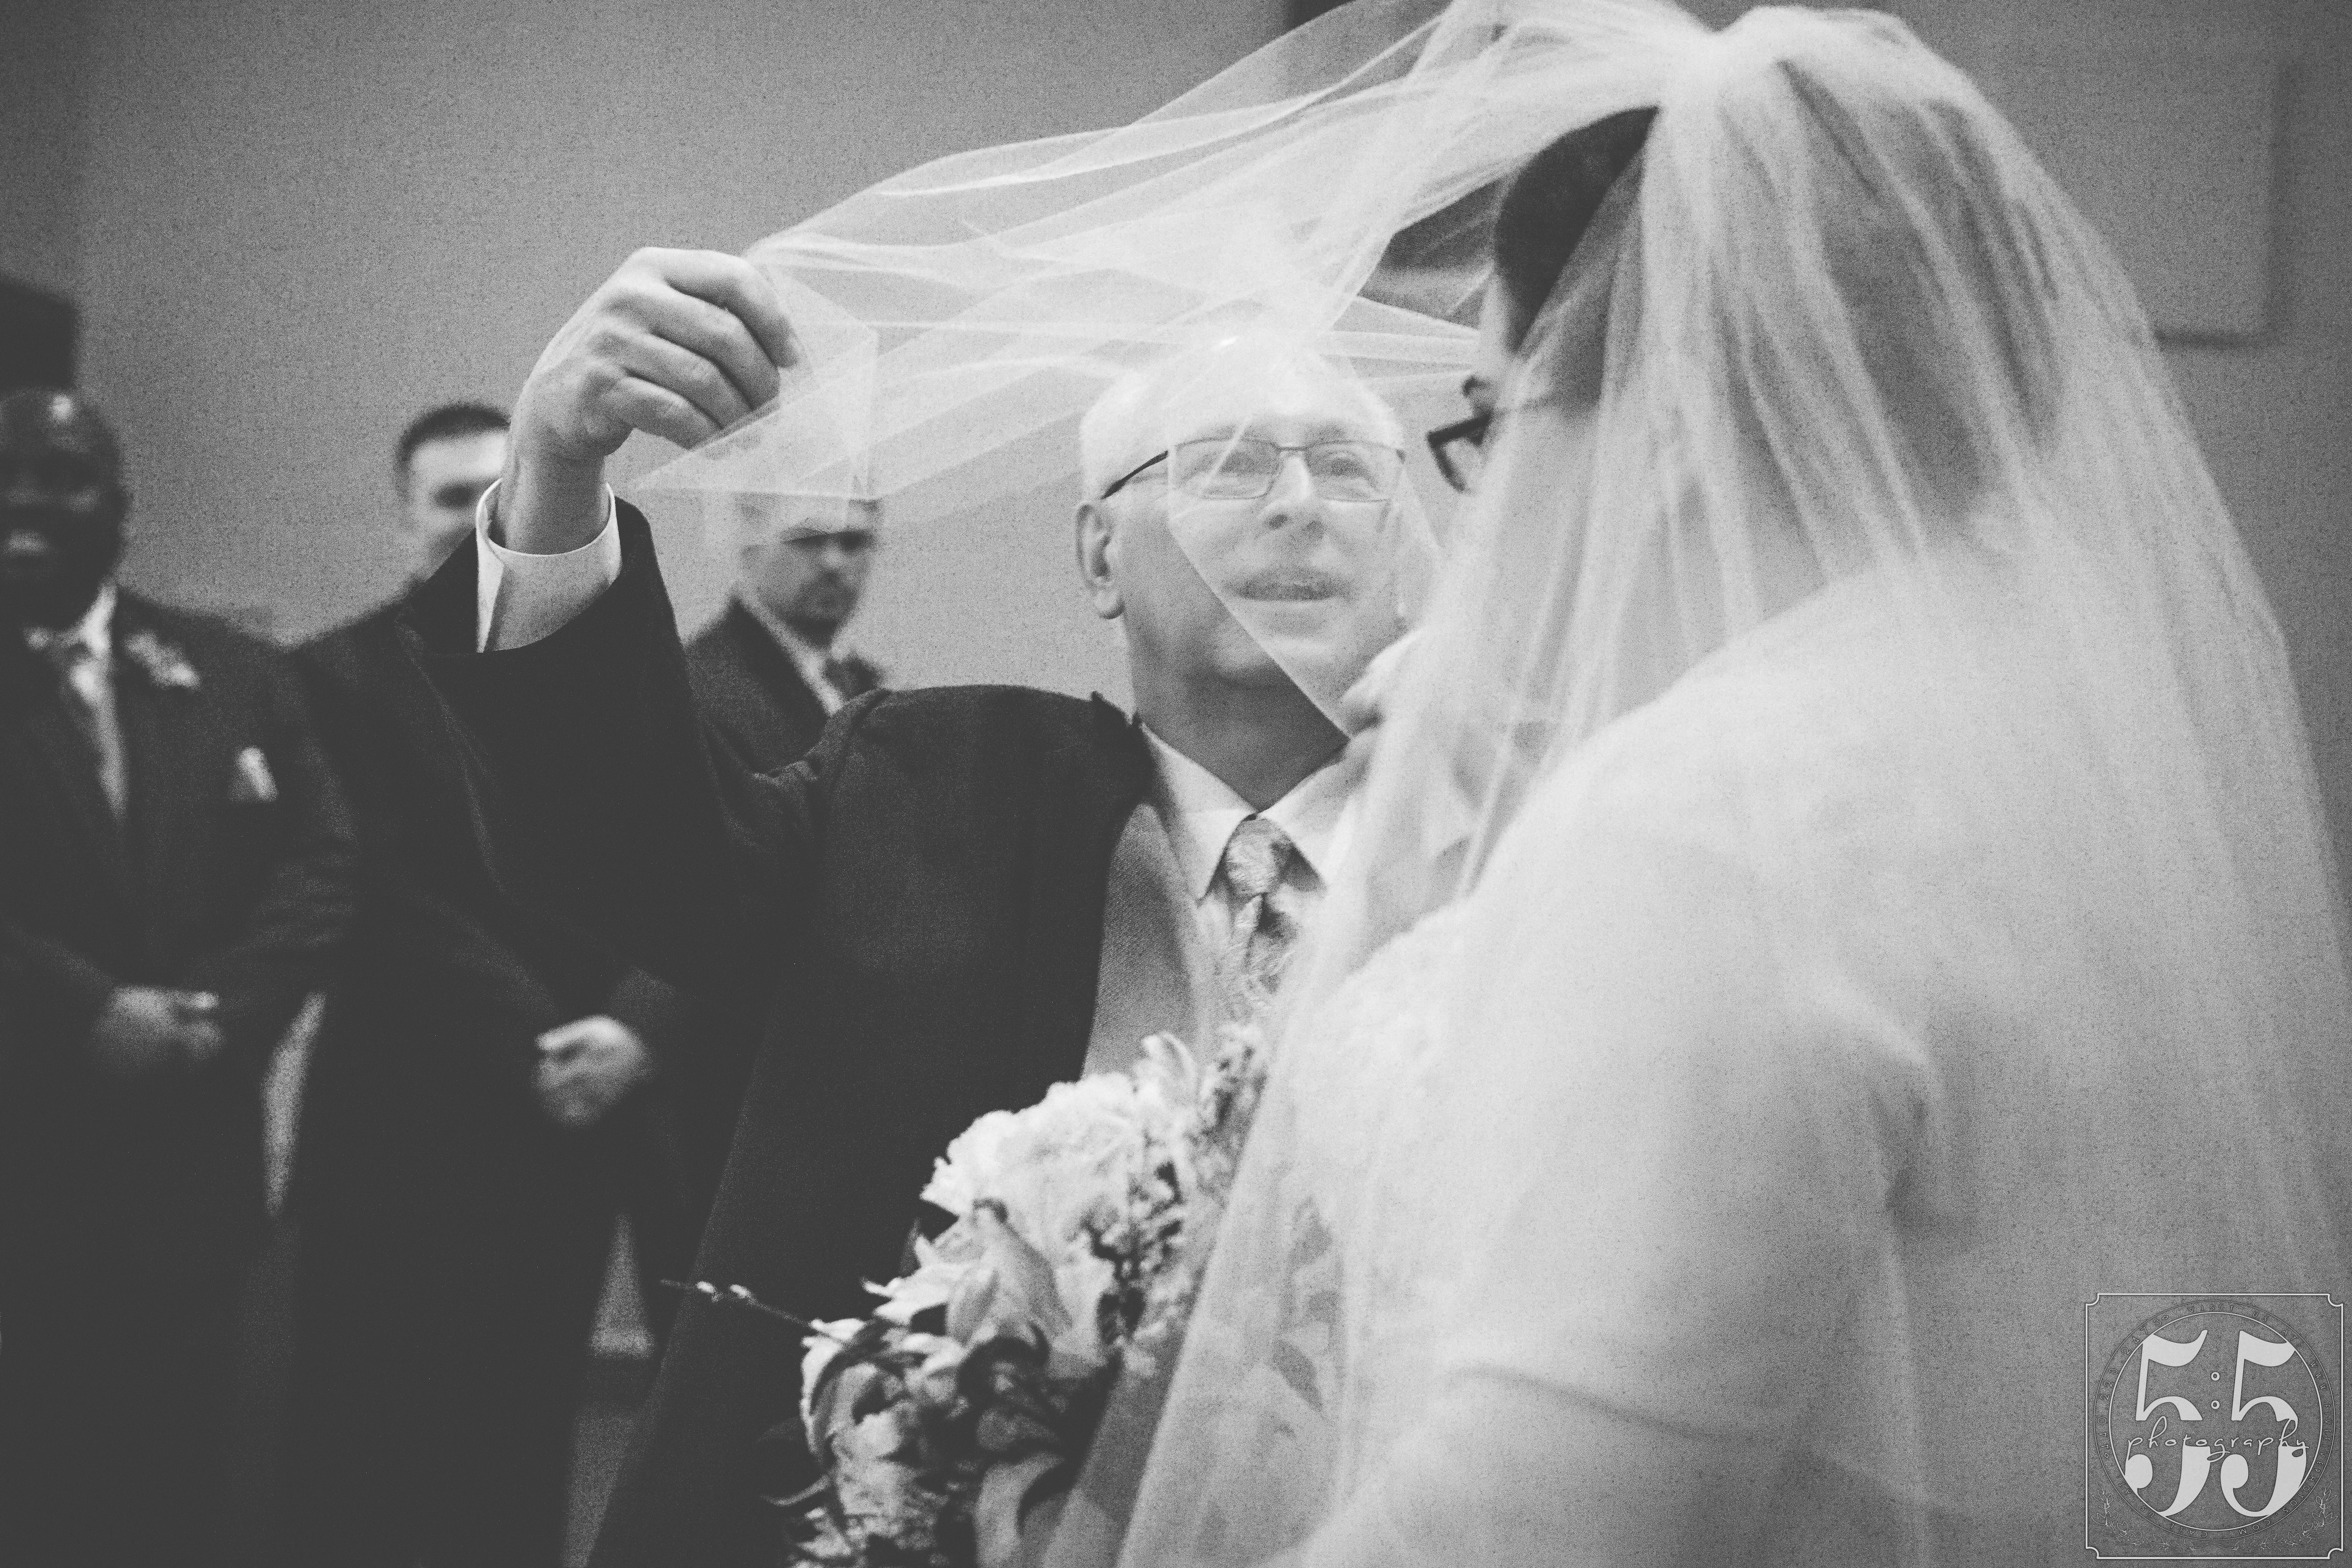
High (1/60+) Shutter Speed Example:
 This was a bright day and it was an important moment. So I chose a higher shutter speed that would give me less light, and a nice crisp image. Motion blur is for having fun and being creative, not for catching MUST HAVE SHOTS. (Trying to get the right motion blur is risky, and it usually takes a few tries before you will get one you like. So I would never use a motion blur technique at a wedding ceremony.)
Aperture (f-stop)
“A space through which light passes in an optical or photographic instrument, especially the variable opening by which light enters a camera.” I relate aperture to my pupil. Easy, right? So in a dark room, what does your pupil do? It dilates. Why? To allow more light in. It is the same with your camera, to let more light in you will need to open up/lower your aperture. Aperture also affects the depth of field. At an aperture of 1.2, you will have a very shallow focus line. By shallow, I mean the eye will be in focus and the nose blurry. At an aperture of say 10, you will have an entire group of people and some of their background in focus. Again, whether you chose a high or a low aperture will depend on the situation and what look you are going for. Higher aperture = more in focus and less light in photo. Lower aperture = less in focus and more light in the photo.
Low (1.2-4.0) Aperture Examples:
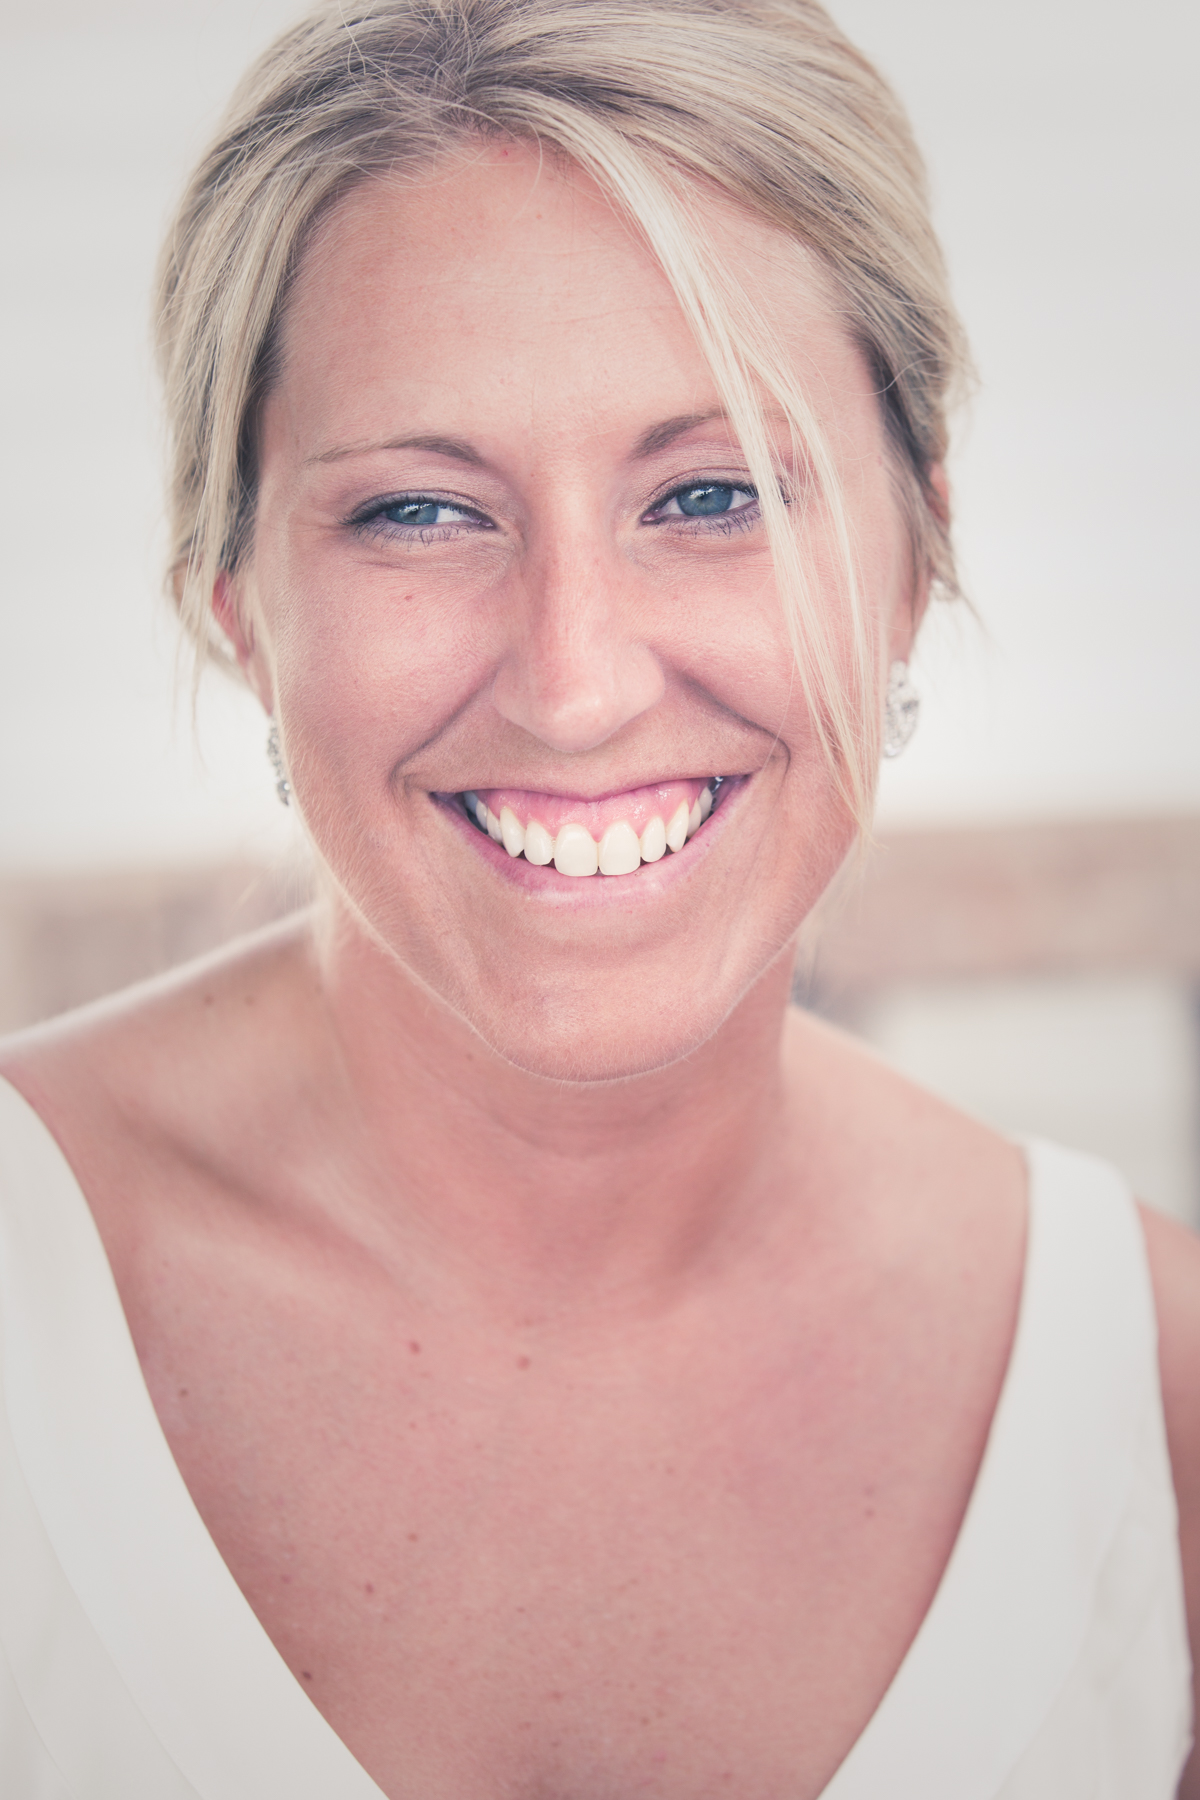
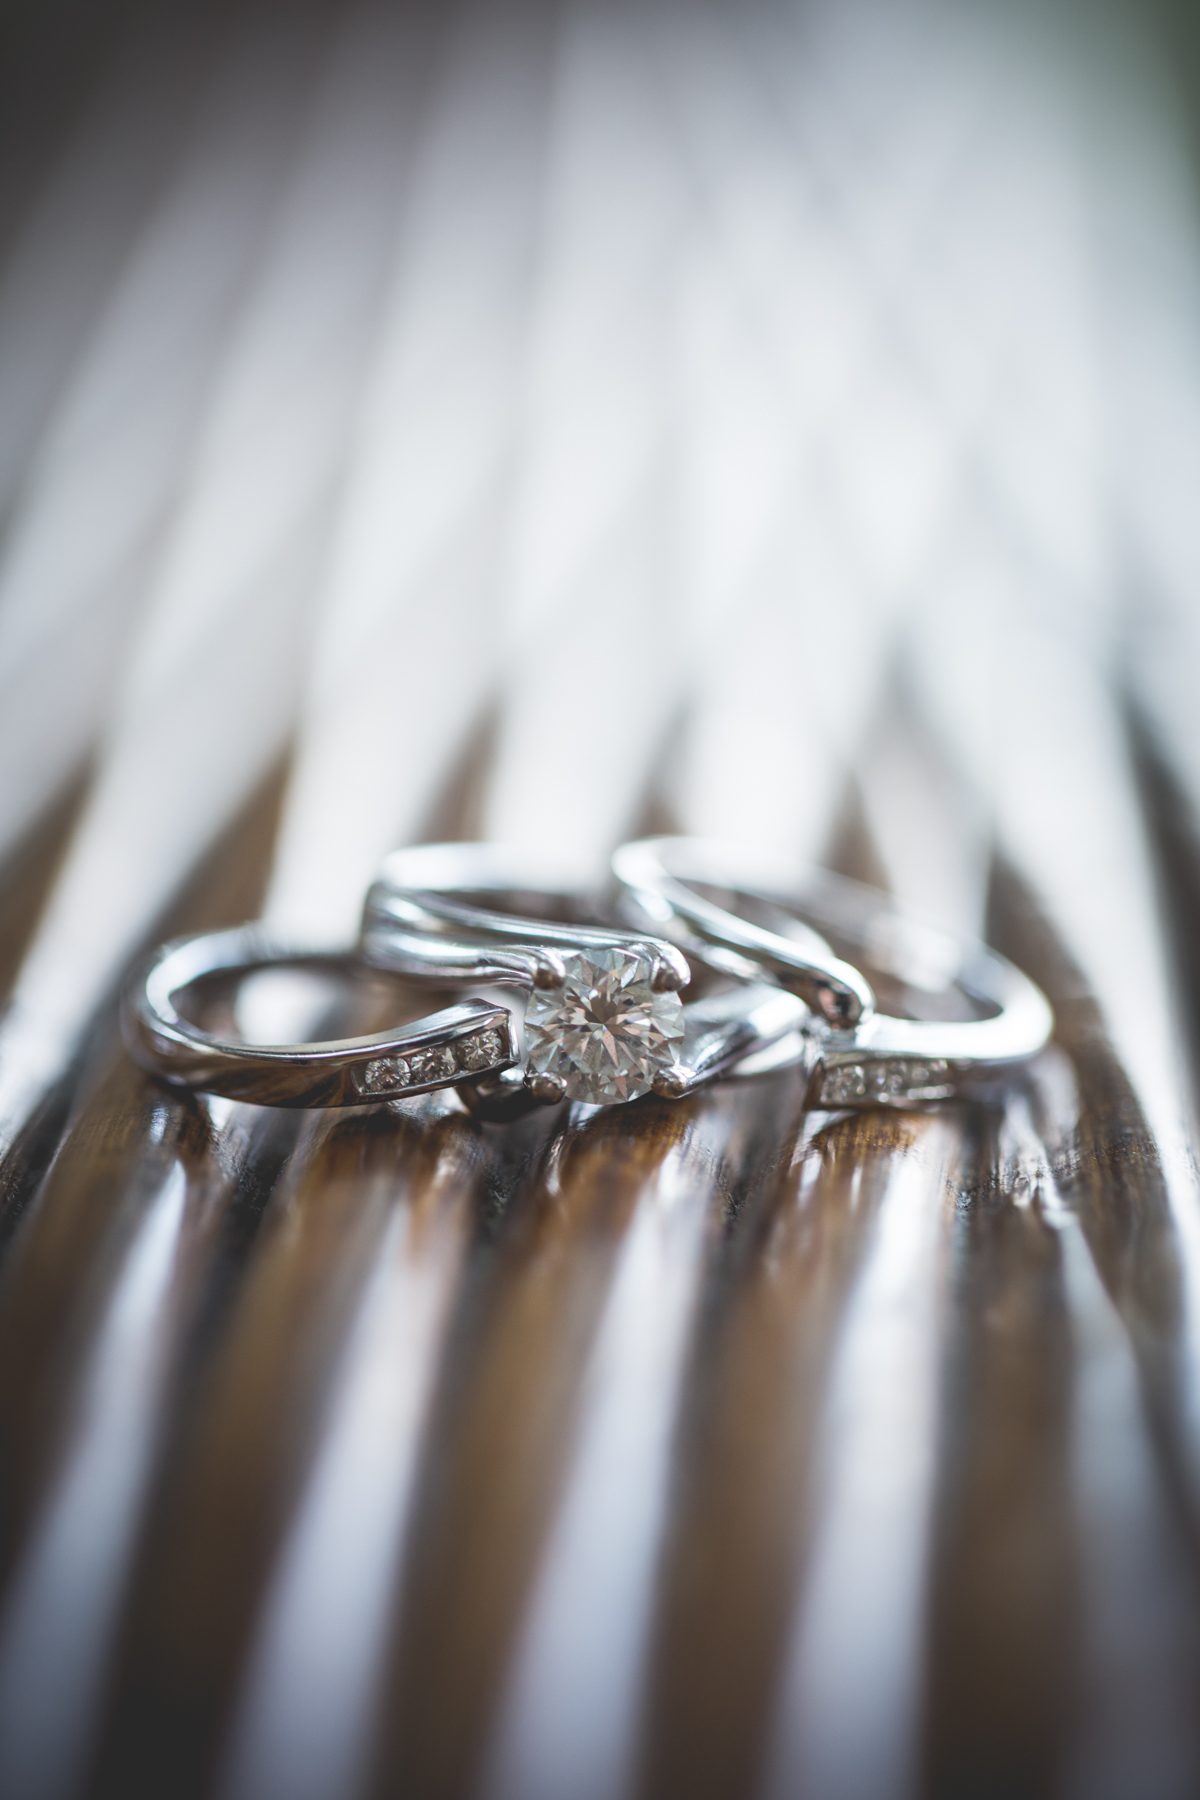 Both of these photos have a low aperture. I typically do a low (1.4-2.0) aperture when photographing portraits. It is so flattering! I love how having a sharp focus on the eye, and a soft focus on the rest of the face draws the audience in right where you want them. Likewise, with the detail shot I wanted the focus to be on that main diamond, not the little diamonds or the band. Another reason I would choose a low aperture is if there is limited light. Here is an example from a wedding reception.
High (4.0+) Aperture Example:
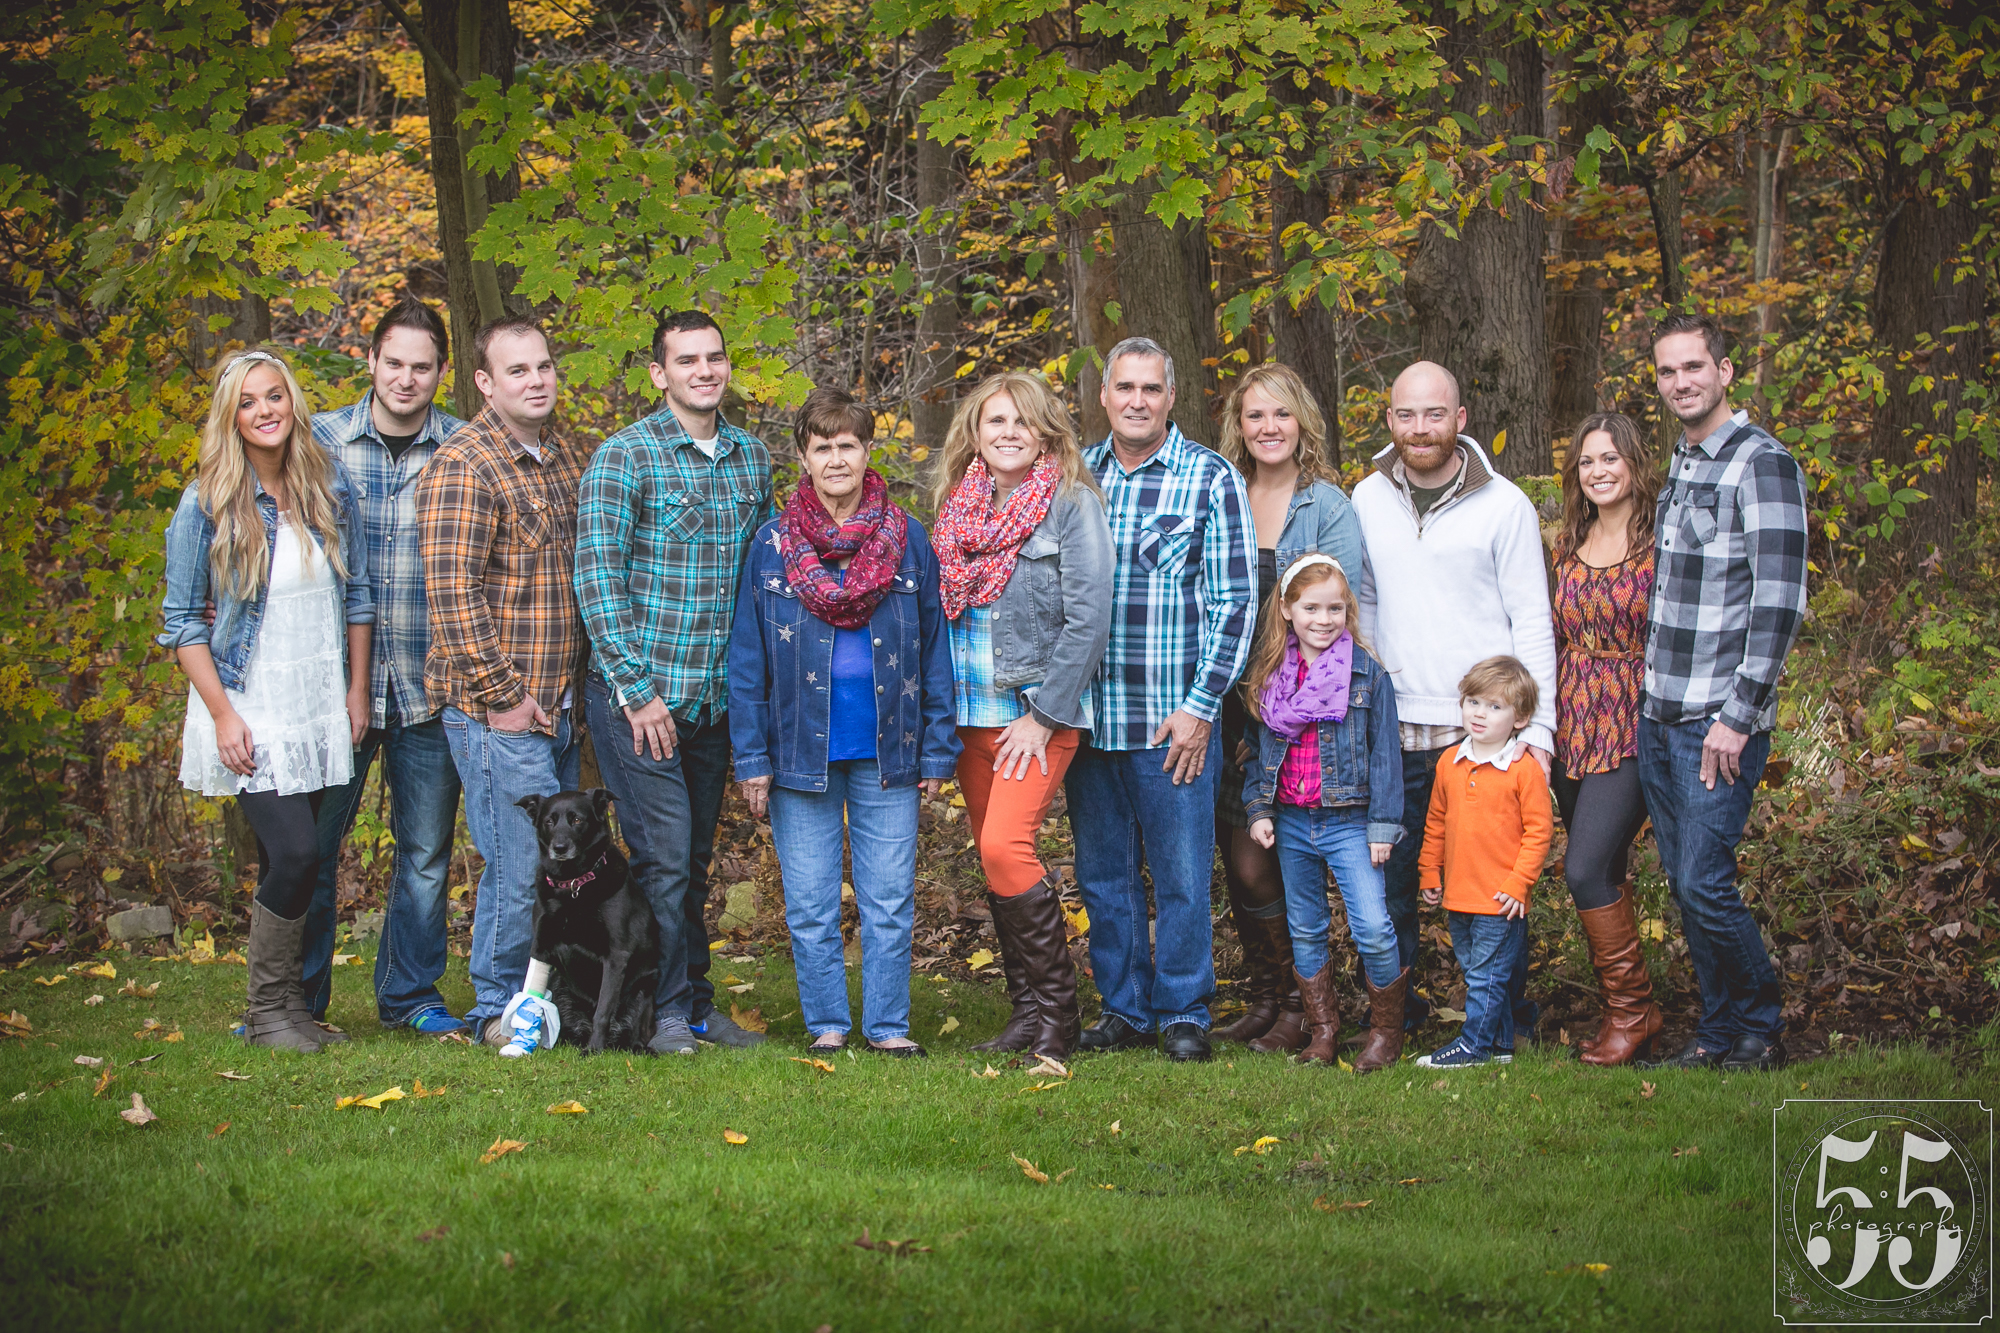 If you are photographing a family, odds are they would like to see everyone’s face in focus. This is when you must have an aperture of at least 5.0+.
ISO
Low (400 or less) ISO Example:

My subject was not moving. I wanted a crisp portrait and we were outside with plenty of light. So I was able to set my ISO lower. Notice it is clear, with little to no noise.
High (600+) ISO Example:
This wedding ceremony was in a sanctuary that had no windows and was “romantically” lit. These are must have photos, officiants typically are not fans of flash, and I couldn’t lower the shutter speed because then the photo would be blurry. I would rather have a noisy photo than a blurry photo! I did edit some of the noise out of this photo, but do you see all the little speckles? That is the noise.
Are you still having a hard time understanding ISO? Here is a link to a blog with a very comprehensive explanation. This guy knows way more about the mechanical side of ISO than I do!
https://photographylife.com/what-is-iso-in-photography
Practice
The first step to learning how shutter speed, aperture, and ISO all work together is knowing what they each do. The second step is PRACTICE. It takes time to get the hang of this trio. It takes time to learn lighting situations. I have been working on teaching these basic principles of photographing in manual to my intern. Now we are practicing. Here are a few photos from her last practice session which she photographed in manual. References:
**Shutter speed, Aperture, and ISO definitions are from Dictionary.com. Other info has come from my few years of education and on hand experience. This is not meant to be an expert level course on photography. Just a helpful set of tips for beginners.